View Daily Sheets, Transaction Lists, Inventory and Liability reports.
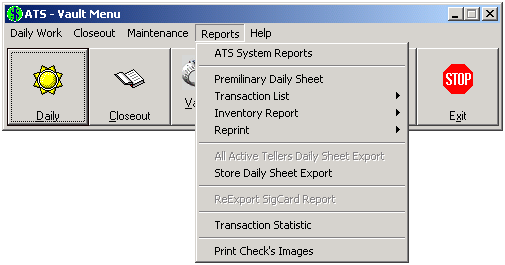
Below is an image of the Vault Reports menu. Click any of the menu items to jump directly to that section.
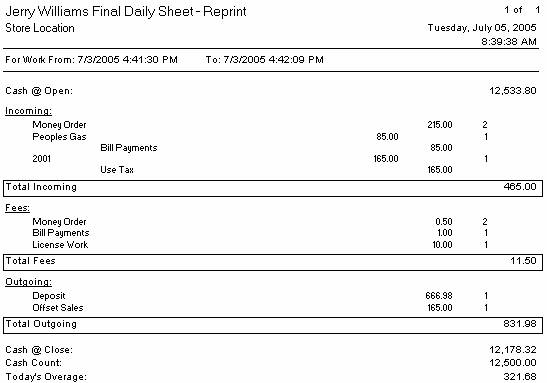
View the Teller Daily Sheet.
NOTE: The Teller Daily Sheet for the current session cannot be viewed from the Vault menu, only the history. See the Daily Sheet section under Teller Menu for details.
View Teller Daily Sheets for closed-out sessions.
Click on the Reports menu, then Reprint, Transaction List, and choose Teller.
The Date Selection Screen appears. Choose from a list of closed-out sessions and press Enter to continue.
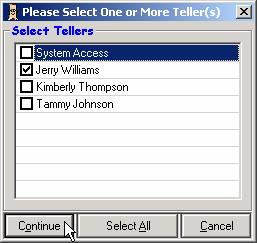
Check the box next to the appropriate teller, or use the Select All button to view a Daily Sheet for each teller. Click Continue.
For details on viewing reports, see Appendix 6 – Using the Report Screens.
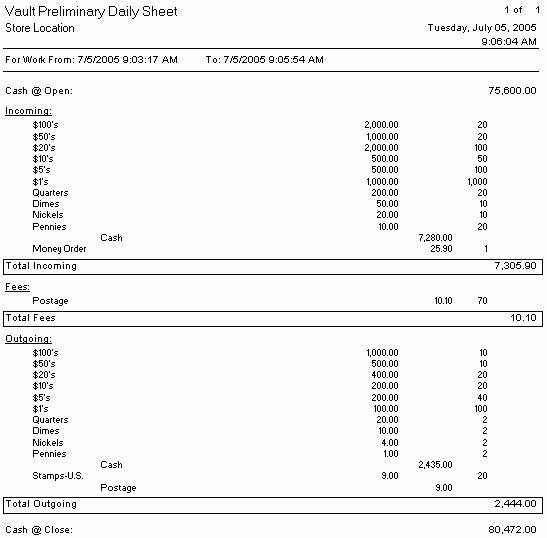
View the Vault Daily Sheet.
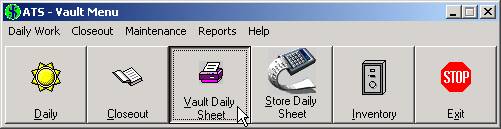
Click on the Vault Daily Sheet button.
Alternatively, click on the Reports menu and choose Preliminary Daily Sheet.
For details on viewing reports, see Appendix 6 – Using the Report Screens.
View Vault Daily Sheet for closed-out sessions.
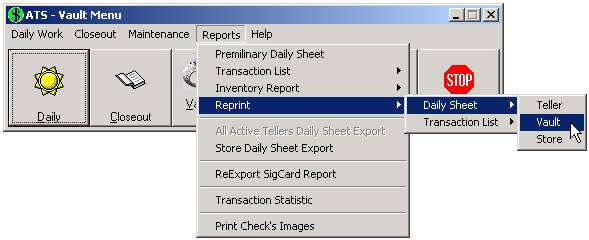
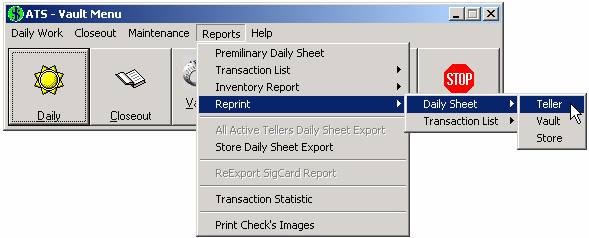
Click on the Reports menu and then Reprint, Daily Sheet, and choose Vault.
The Date Selection Screen appears. Choose from a list of closed-out sessions and press Enter to continue.
The Vault Daily Sheet comes up for the selected date. View the previous section for an example.
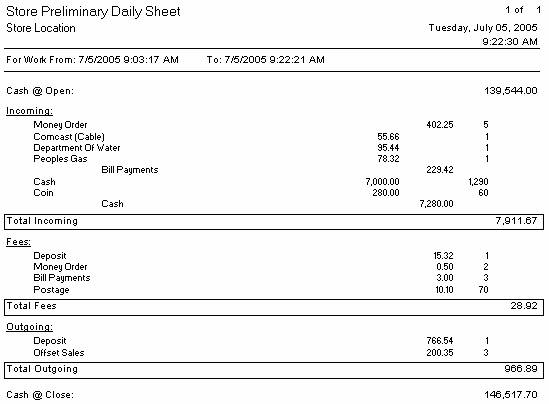
View the Store Daily Sheet for the current session.
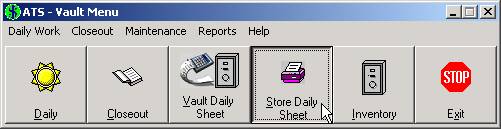
Click on the Store Daily Sheet button.
For details on viewing reports, see Appendix 6 – Using the Report Screens.
View Store Daily Sheet for closed-out sessions.
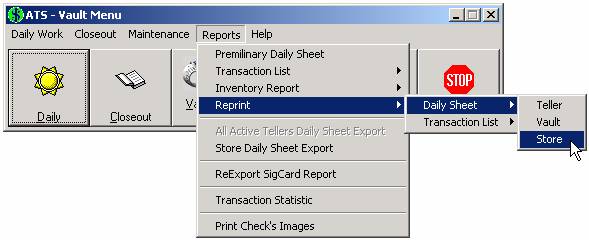
Click on the Reports menu and then Reprint, Daily Sheet, and choose Store.
The Date Selection Screen appears. Choose from a list of closed-out sessions and press Enter to continue.
The Store Daily Sheet comes up for the selected date. View the previous section for an example.
View a list of transactions for a teller or group of tellers.
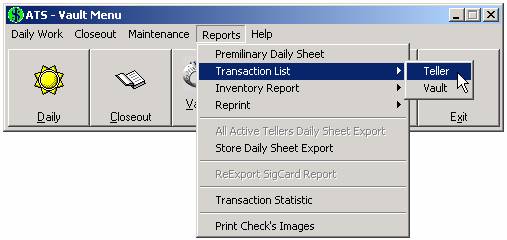
Click on the Reports menu, Transaction List, and choose Teller.
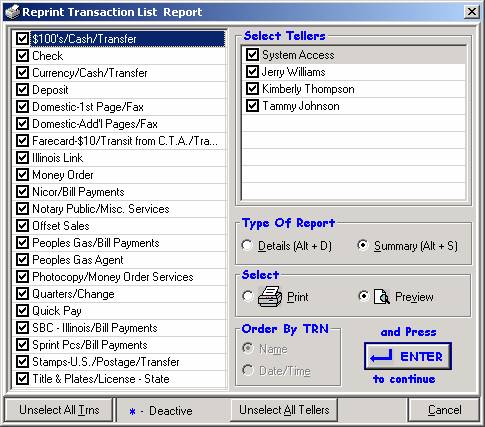
Pressing Enter without changing any of the settings shows a report of all teller transactions for the specified session. Otherwise, features in this window allow the user to narrow down what is shown in the report.
The report includes only the types of transactions with a check mark next to them. The default, as seen above, is that all types of transactions are checked. Click on the box next to a transaction to toggle on or off the check-mark. The UnSelect All Trns button at the bottom of the screen removes all check marks. Once clicked this button changes to Select All Trns.
On the right side of the screen, the Select Tellers box has all tellers marked by default. Click on the box next to a teller to toggle on or off the check-mark. As with the transactions, the UnSelect All Tellers button at the bottom of the screen removes all check marks. Once clicked this button changes to Select All Tellers.
Summary is marked in the Type of Report section. This means individual transactions are not displayed, only the day’s total. To view each transaction, click on Details. When Details is marked, the Order By TRN box allows the user to choose the order transactions are listed.
Leave the default at Preview to view the report on your screen. Choose Print to send the report directly to the printer without viewing it.
Press Enter to create the report.
For details on viewing reports, see Appendix 6 – Using the Report Screens.
View Teller transactions for closed-out sessions.
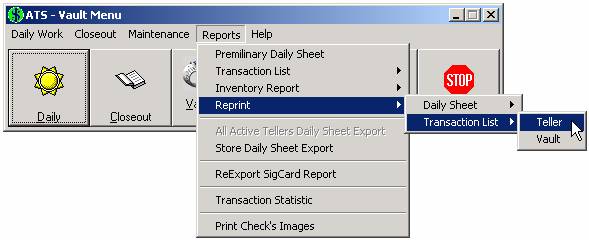
Click on the Reports menu, Reprint, Transaction List, and choose Teller.
The Date Selection Screen appears. Choose from a list of closed-out sessions and press Enter to continue.
A window appears that looks and works exactly like the report screen described above.
View a list of Vault transactions.
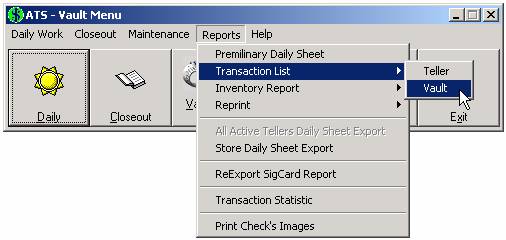
Click on the Reports menu, Transaction List, and choose Vault.
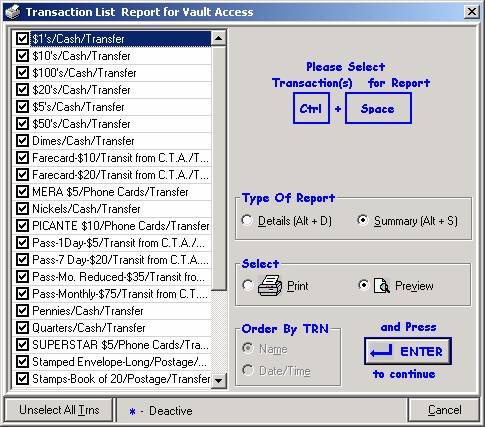
Pressing Enter without changing any of the settings shows a report of all Vault transactions for the specified day. Otherwise, features in this window allow the user to narrow down what is shown in the report.
The report includes only the types of transactions with a check mark next to them. The default, as seen above, is that all types of transactions are checked. Click on the box next to a transaction to toggle on or off the check-mark. The UnSelect All Trns button at the bottom of the screen removes all check marks. Once clicked this button changes to Select All Trns.
Summary is marked in the Type of Report section. This means individual transactions are not displayed, only the day’s total. To view each transaction, click on Details. When Details is marked, the Order By TRN box allows the user to choose the order transactions are listed.
Leave the default at Preview to view the report on your screen. Choose Print to send the report directly to the printer without viewing it.
Press Enter to create the report.
For details on viewing reports, see Appendix 6 – Using the Report Screens.
View Vault transactions for closed-out sessions.
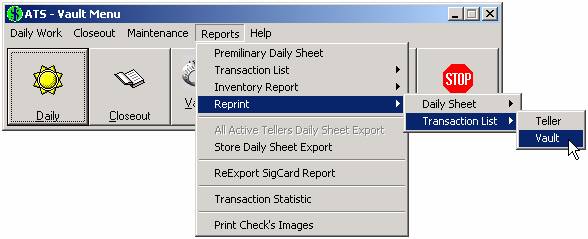
Click on the Reports menu, Reprint, Transaction List, and choose Vault.
The Date Selection Screen appears. Choose from a list of closed-out sessions and press Enter to continue.
A window appears that looks and works exactly like the report screen described above.
View the current inventory for a teller or group of tellers, the Vault, or the entire Store.
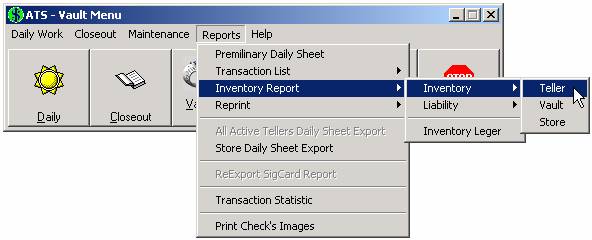
Click on the Reports menu and then Inventory Report, Inventory, and choose from Teller, Vault, or Store.
Teller – View the current inventory for a single teller or a combination of tellers.
Vault – View current inventory for the Vault.
Store – View the total inventory for the Vault and all tellers.
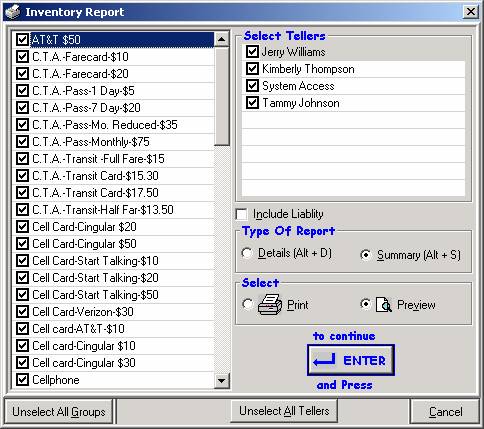
NOTE: The Select Tellers box at the top right is only included for the teller option. For Vault and Store, this area is blank.
Pressing Enter without changing any of the settings shows a report of the current inventory for all tellers combined. Otherwise, features in this window allow the user to narrow down what is shown in the report.
The report includes only the types of inventory with a check mark next to them. The default, as seen above, is that all types of inventory are checked. Click on the box next to an item to toggle on or off the check-mark. The UnSelect All Groups button at the bottom of the screen removes all check marks. Once clicked this button changes to Select All Groups.
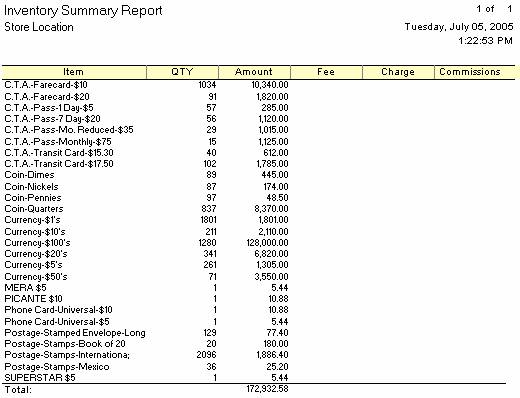
Summary is marked in the Type of Report section and displays the total for each type of selected inventory. Details breaks it down by teller.
Leave the default at Preview to view the report on your screen. Choose Print to send the report directly to the printer without viewing it.
Press Enter to create the report.
For details on viewing reports, see Appendix 6 – Using the Report Screens.
View the Vault Inventory Report.
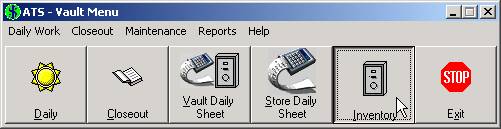
The Vault Inventory report is one of the more common reports used on a daily basis. It therefore gets a button on the main menu for quick access.
View liability totals for tellers that are closed out.
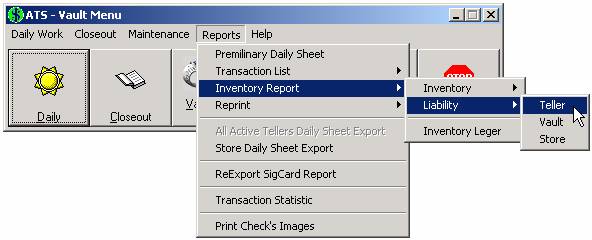
Click on the Reports menu and then Inventory Report, Liability, and choose either Teller or Store.
Teller – View the current liabilities for a single teller or a combination of tellers. (Only closed out tellers are included.)
Vault – This option is generally not used. The ‘No Info Selected’ message appears because no Vault items include a liability.
Store – Displays the total liabilities for all tellers.
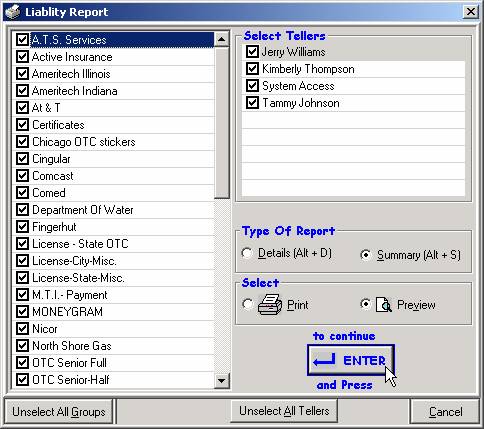
NOTE: The Select Tellers box at the top right is only included for the teller option. For Vault and Store, this area is blank.
Pressing Enter without changing any of the settings shows a liability report for all tellers combined. Otherwise, features in this window allow the user to narrow down what is shown in the report.
The report includes only the liabilities with a check mark next to them. The default, as seen above, is that all liabilities are checked. Click on the box next to an item to toggle on or off the check-mark. The UnSelect All Groups button at the bottom of the screen removes all check marks. Once clicked this button changes to Select All Groups.
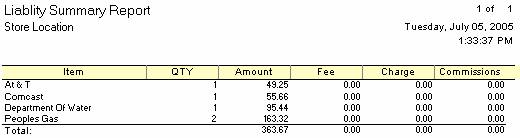
Summary is marked in the Type of Report section which displays the total liabilities for all closed out tellers. Details breaks down the totals for each teller.
Leave the default at Preview to view the report on your screen. Choose Print to send the report directly to the printer without viewing it.
Press Enter to create the report.
For details on viewing reports, see Appendix 6 – Using the Report Screens.
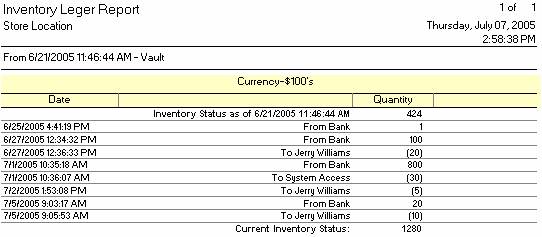
View the current quantity and history of transactions for an individual inventory item.
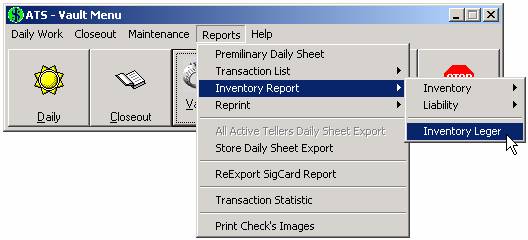
Click on the Reports menu, Inventory Report, and choose Inventory Leger.
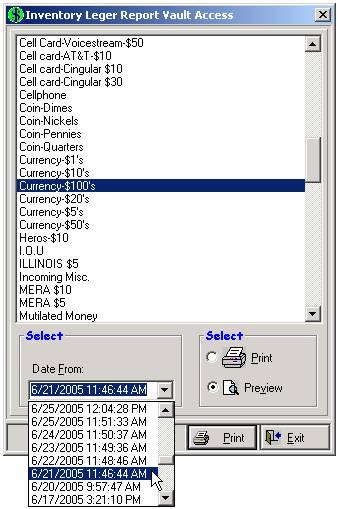
Choose the inventory item to trace from the list above. Any transfer between the current session and the session chosen in the Date From drop down list is included.
Leave the default at Preview to view the report on your screen. Choose Print to send the report directly to the printer without viewing it.
Click the Print button to create the report.
For details on viewing reports, see Appendix 6 – Using the Report Screens.
All history reports have been described in previous sections. Click on one of the following links to jump directly to that section.
Teller Transaction List - History
Vault Transaction List - History
Export Daily Sheet for a selected date.
NOTE: This function is intended for stores with the Main Office Daily Sheet application.
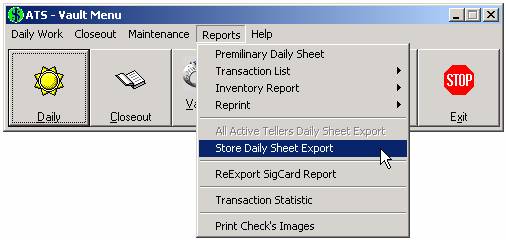
Click on the Reports menu and choose Store Daily Sheet Export.
The Date Selection Screen appears. Choose from a list of closed-out sessions and press Enter to continue.
An XML file is generated in the directory specified in ATS Setup, Store Setup.
Repeat this process for further Daily Sheet exports, or click the Exit button to return to the main menu.
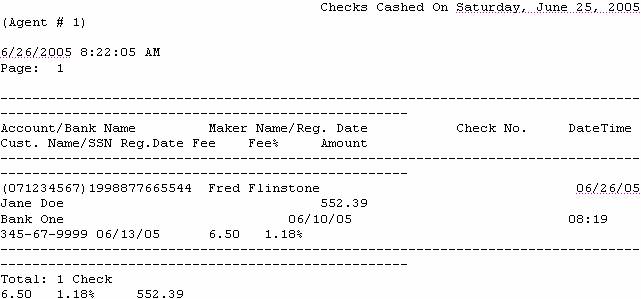
Create a text document of checks cashed for a specified date.
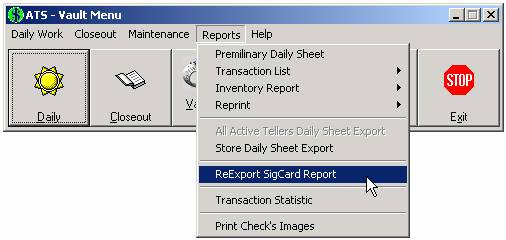
Click on the Reports menu and choose ReExport SigCard Report.
The Date Selection Screen appears. Choose from a list of closed-out sessions and press Enter to continue.
A text file is created named Report01.doc. It can be found in the Export File Path (set in ATS Setup, Store Setup).
View a graphical representation of teller activity for a specified date.
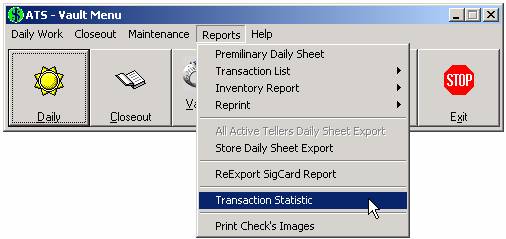
Click on the Reports menu and choose Transaction Statistic.
The Date Selection Screen appears. Choose from a list of closed-out sessions and press Enter to continue.

For details on viewing reports, see Appendix 6 – Using the Report Screens.
View or print check images for a specified day.
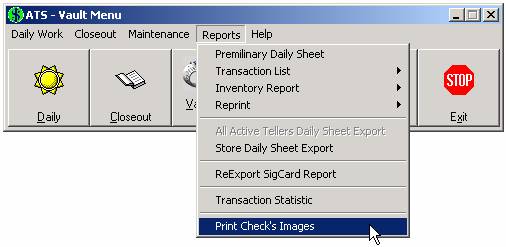
Click on the Reports menu and choose Print Check Images.
The Date Selection Screen appears. Choose from a list of closed-out sessions and press Enter to continue.
For details on viewing reports, see Appendix 6 – Using the Report Screens.