Before using SigCard, you need to make several
decisions on how it should operate. SigCard uses various defaults and tables
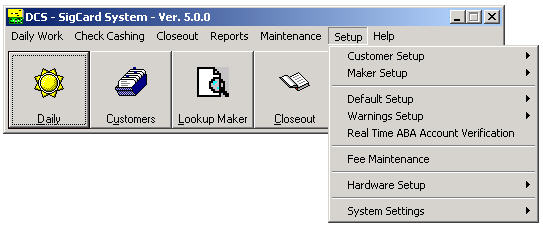
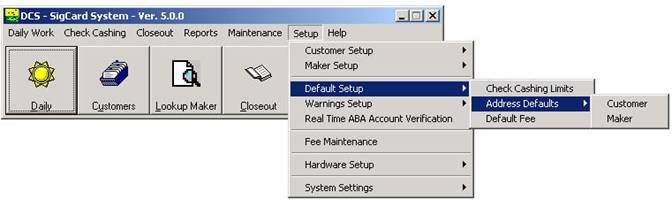
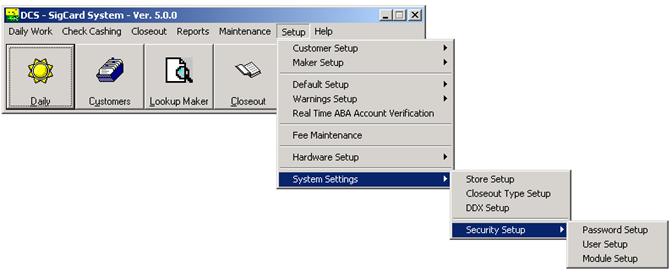
that are established via the Setup Menu. Select ‘Setup’ from the main menu. The
Setup Menu consists of several options as displayed on the screen below.
Customer Setup
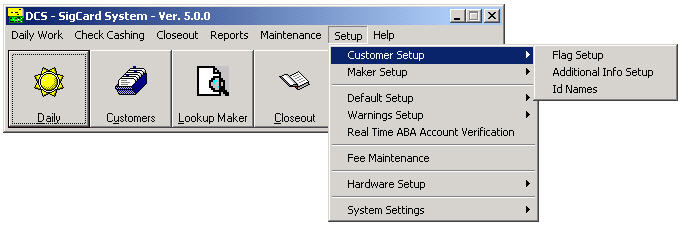
Flag Setup
A flag is a notation that appears on the customer
information screen. You can set up an unlimited number of flags to be used to
immediately bring to your attention a condition you wish to be notified about
regarding a particular customer. Only one flag can been associated with a specific
customer. You can designate Can Cash and/or See Memo with the flag.

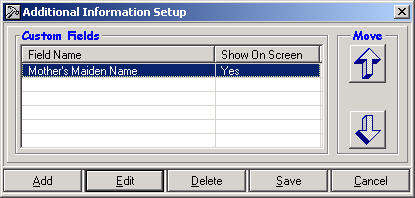
Additional Information Setup
User defined fields can be added for additional
customer information. There can be unlimited custom fields; two will be displayed
on the customer information screen as separate fields. All others will be
displayed in the Additional Information.
ID Names
SigCard allows you to setup your
own ID names and descriptions based on the types of identification you accept.
You can setup a driver's license, government ID, passport, or any other type of
acceptable ID. You can also specify the
type of character that is allowed in each position of the ID field by defining
an 'input mask'. The input mask is a template that helps eliminate input
errors. There are a number of characters that you can use to design the ID
mask. Some of these characters restrict the data that can be entered. Below is
a list of the format characters and their restrictions.
|
X
|
Alpha, numeric and special characters
|
a,b,c,d…1,2,3…#$%
|
|
9
|
Numbers only
|
1,2,3,4
|
|
A
|
Alphabetical only
|
a,b,c,…
|
|
!
|
Upper case alphabetical only
|
A,B,C…
|
An example of an Illinois
driver's license is: G265-3434-7588
The input mask would be:
A999-9999-9999
Maker Setup
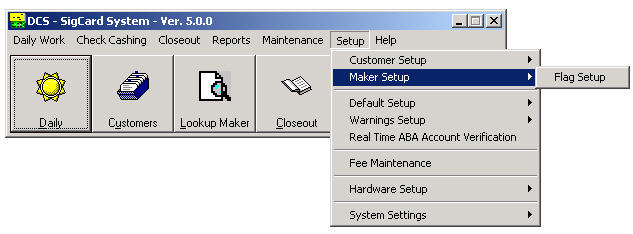
Flag
Setup
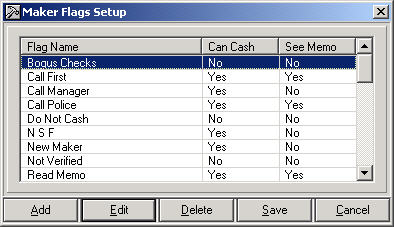
A flag is a notation that appears on the maker
information screen. You can set up an unlimited number of flags to be used to
immediately bring to your attention a condition you wish to be notified about
regarding a particular maker. Only one flag can been associated with a specific
maker. You can designate Can Cash and/or See Memo with the flag.
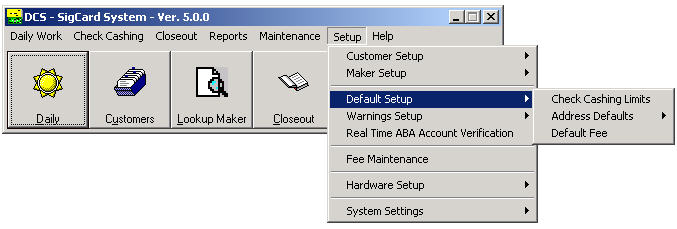
Default Setup
Default settings are restrictions and values that will
automatically be processed or entered as information. If the default is
informational, it can be changed by the user. As an example, if the customer
address is automatically entered as the state of Illinois,
the user can change it to another state.
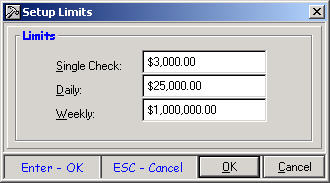
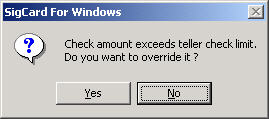
Check Cashing Limits
Limits can be set to warn a teller whenever they have
a check cashing transaction where the single check, daily, or weekly amount is
exceeded. The teller will not be prevented from completing the transaction.
Single. Allows
you to setup a warning based on how much you allow a teller to cash for any
single check.
Daily. Allows
you to set up a warning based on how much you allow a teller to cash in one
day.
Weekly. Allows
you to set up a warning based on how much you allow a teller to cash in a week.
A week is always the past seven calendar days and not Monday through
Sunday.
If the
limit is reached, the following warning will be displayed.
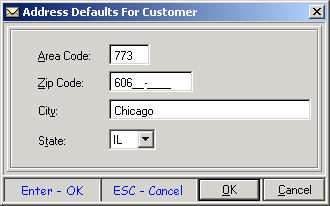
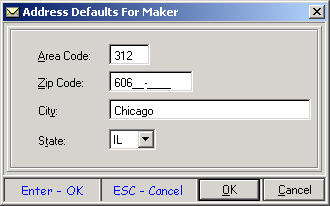
Address Defaults
For each customer and maker record that you add to
your files, you will need to input information into various fields. In order to
simplify input, SigCard lets you setup a number of defaults that will
automatically be selected when adding a new record. The default information can
be changed by the user. As an example, if the customer address is automatically
entered as the state of Illinois, but the customer is in Indiana, the user can
change it.
Area Code. The area code that will be automatically
displayed when entering the phone number of a new customer or maker.
Zip Code. The zip code that will be automatically
displayed when entering the address of a new customer or maker.
City. The city that will be automatically displayed
when entering the address of a new customer or maker.
State. The state that will be automatically
displayed when entering the address of a new customer or maker.
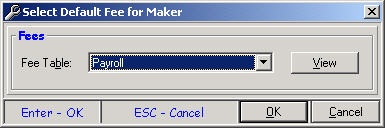
Default Fee for Maker
SigCard allows for a default fee to be assigned
automatically when a new maker is added. This default value does not affect any
existing makers.
Warnings Setup
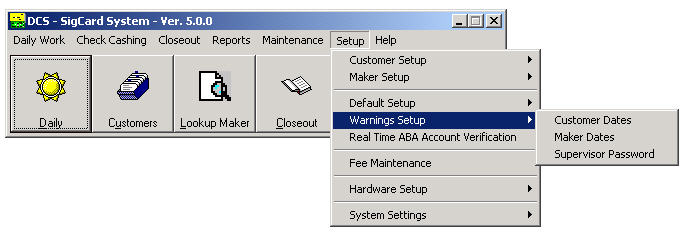
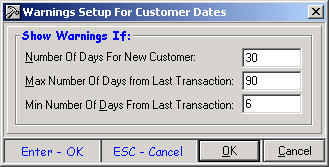
Customer and Maker Dates
SigCard can track elapsed time since the last activity
of a customer or maker and the number of days since the customer or maker was
added to the system. You will probably want to know if there has been very
recent activity, especially on the part of the customer, or if there has been
no activity for quite some time. You can determine these lengths of time by
entering in minimum and maximum days for the customer and maker files.
Number of Days
for New Customer: Warning occurs
when a customer has recently been added to the system.
Max Number of
Days from Last Transaction: Warning occurs when there have been no recent
transactions. If a customer has not recently cashed any checks, you may want a
warning to occur when the customer does come in after a significant amount of
time.
Min Number of
Days from Last Transaction: Warning occurs when there is recent activity
for the customer. If a customer has recently cashed a check, you may want a
warning to occur.
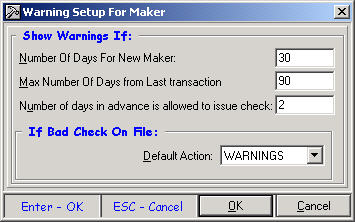
Number of Days
for Maker Customer: Warning occurs when
a maker has recently been added to the system.
Max Number of
Days from Last Transaction: Warning occurs when there have been no recent
transactions. If a maker has not recently had any transactions, you may want a
warning to occur when the maker is part of a transaction.
Number of days
in advance is allowed to issue check: Number of days prior to the date the
check was issued that the check can be cashed.
Default Action: Automatic action to take if the maker has a bad
check on file. Warnings can be displayed
or checks for that maker can be blocked if the maker has a bad check on file.
Supervisor Password
This is used to enforce a limit over which the teller
needs managerial approval to cash the check.
For information on how to setup and enforce a teller check limit, click
the following link.
http://www.dcsorg.com/whats_new/5.4.1.51%20changes.htm#_5.)_Enforcing_a_teller_check_cashin
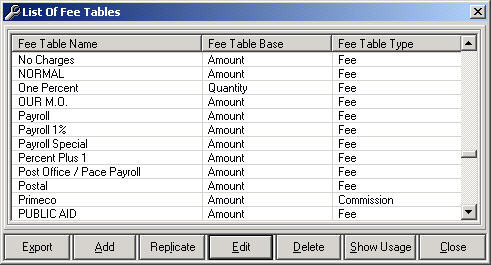
Fee Maintenance
SigCard is a flexible software product. It allows you to add as many fee tables as
needed. When a fee table is added, a Fee
Table Name, Fee Table Base, and Fee Table Type must be specified.
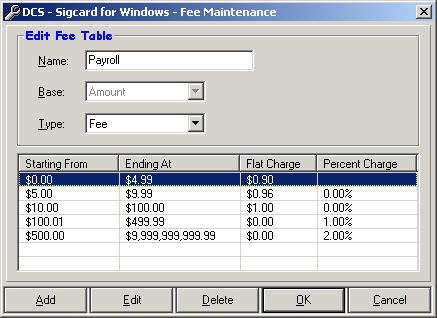
You will then need to setup one or
more brackets or fee ranges for each fee schedule and setup the associated
charge(s). Specify a ‘Start From’ figure
for the range and a flat charge, percent charge, or both and select ‘OK’. Once this is done, the ‘Ending At’ figure
will automatically be calculated. If
zero is specified as the ‘Start From’, then the ‘Ending At’ figure will be
infinity or all nines. In certain
instances, there will be more charges associated with a fee schedule. For example, if there is another charge for a
$100, a second range must be added by selecting the ‘Add’ button. Specify the ‘Start From’ range as $100 and
the associated flat and/or percent charge.
Once the $100 range is added, the previous range will calculate a new
‘Ending At’ amount of $99.99 and the new ‘Ending At’ amount for the $100 range
will be infinity or all nines.
Real Time ABA
Account Verification
Enter settings to
enable check verification services.
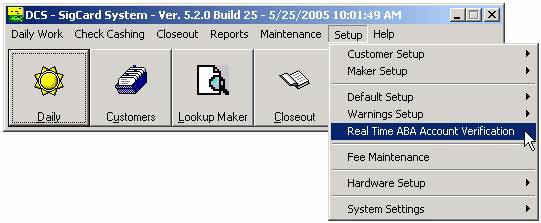
Click on the Setup menu and choose the Real Time ABA Account Verification option.
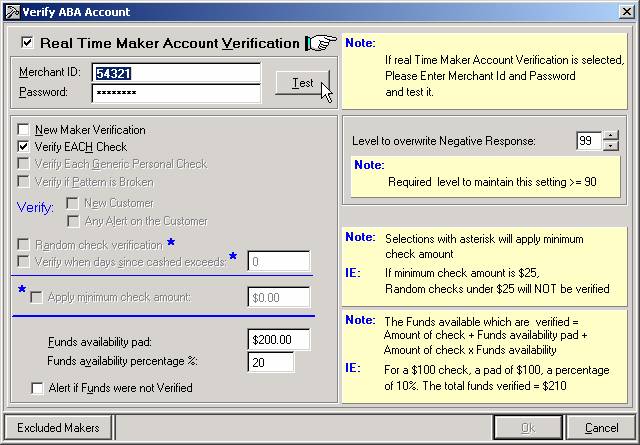
Enable ABA
verification by checking the box next to Real
Time Maker Account Verification.
Enter the Merchant ID and Password provided by ACH Direct.
Click the Test button.

The image above is
displayed while the ID and password are verified.
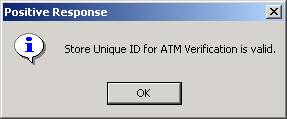
A positive
response message appears if verification is successful. Click OK
to continue.
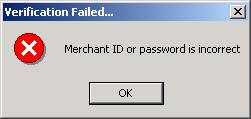
A response like the one above
indicates a failed verification.
Re-enter the Merchant ID and Password and try again. Be sure to use correct capitalization as
these fields are case sensitive. Contact
ACH Direct if the problem persists.
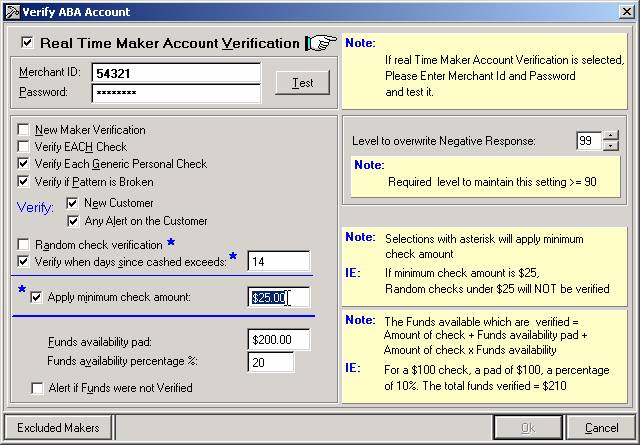
The remaining fields allow for detailed
control over which checks are verified and which are not. Limiting certain checks avoids unnecessary
verification and speeds up the check-cashing process.
New Maker Verification— Run
verification on all new makers.
Verify EACH Check— All checks are
verified. The rest of the fields are
ignored.
Verify Each Generic Personal Check—
Verify all generic personal checks.
Verify if Pattern is Broken— Verify if maker does not match normal
pattern for a certain customer- ie: Normal amount of check is $500, but this
time the check received is $5,000.
New Customer— Verify checks for new
customers.
Any Alert on the Customer— Run
verification if a warning is tied to this customer.
Random Check verification— Checks are
randomly verified if they are above the amount entered in the Apply minimum check amount field.
Verify when days since cashed exceeds— If customer has not cashed a
check for the number of days entered here, the check is verified. (Check must also be above the amount entered
in the Apply minimum check amount
field.)
Apply minimum check amount— Check this
box and enter the minimum value.
Selections with an asterisk do not verify checks below this amount.
Funds availability pad— Enter a value to verify sufficient funds in
the account. The amount verified is
determined by the formula described on the right side of the screen.
Funds availability percentage %-- Works together with the
availability pad to verify sufficient funds in the account. The amount verified is determined by the
formula described on the right side of the screen. NOTE-
IMPORTANT- At this time, a specific amount of funds can NOT be verified on most
accounts.
Alert if Funds were not Verified— Available funds cannot be
verified. Checking this box alerts the
user when this is the case. The default
value for this is OFF. The reason for this is that at this time,
MOST accounts can NOT have funds verified.
Excluded Makers— Some makers are
generally safe and do not need verification.
Additionally, any ABA-ONLY checks can NOT be verified.
Clicking this
button brings up the following window.
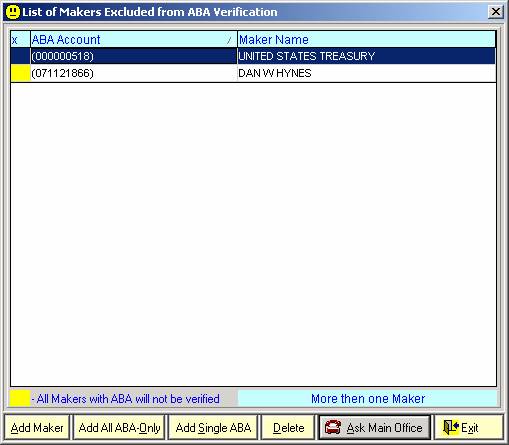
Any maker listed
here will not be verified. Use the
buttons at the bottom of the screen to choose which makers are included in this
list.
Add Maker— Lookup and add a maker to
the list.
Add All ABA-Only— Fills the list with
any maker where ABA Only is checked.
Add Single ABA— Lookup and add a single
ABA account number to this list.
Delete— Remove the highlighted entry
from the list.
Ask Main Office— Click here to check
with main office for recommended makers.
The list will fill in with accounts that are generally safe.
Exit— Return to previous screen.
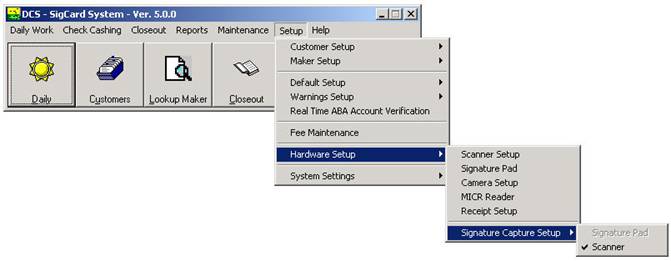
Hardware Setup
There are a number of hardware settings that need to
be defined in order for SigCard to work properly.
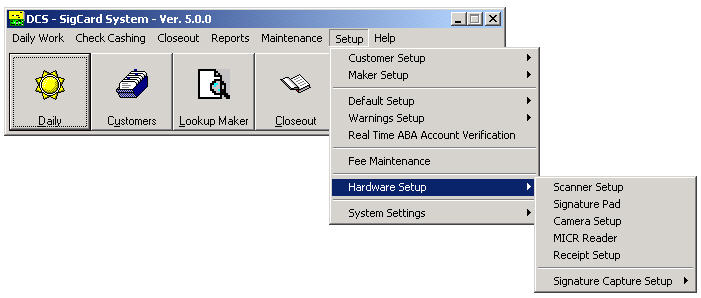
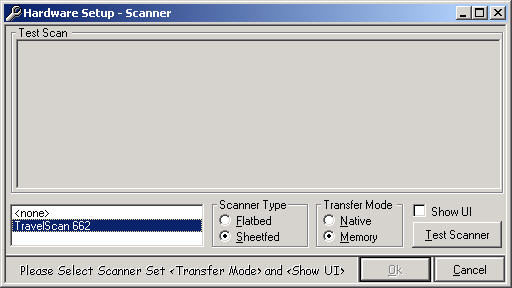
Scanner Setup
A scanner is used to capture images of customer ids,
customer signature and maker checks (as a generic check). It must be a TWAIN
compliant scanner. Each scanner has a driver that must be installed prior to
setting up the scanner. Select the driver file for the scanner. Choose the
scanner type, either flatbed or sheet fed.
Select the Native transfer mode. Do not check Show UI. Once these
settings have been defined, test the scanner.
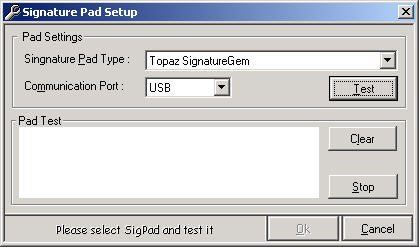
Signature Pad
A signature pad is used to capture the handwritten
customer signature when a new customer is added or each time a check is cashed.
Currently, SigCard uses the Topaz SignatureGem signature pad. Select the
signature pad type and the USB communication port from the drop down boxes. Once these selections have been made, run a
test to be sure the signature pad is working properly.
Camera Setup
Select the camera being used to capture the customer’s
image from the list. Selecting any of
the device settings buttons will allow you to adjust camera settings; such as
brightness, contrast, etc.


MICR Reader
The characters at the bottom of a check sometimes
referred to, as the MICR lines are the key by which all checks are
automatically processed in the United States today. A MICR (magnetic ink
character recognition) check reader will read the characters on checks to
identify the bank and account numbers. If an existing maker matches to the bank
/account numbers SigCard will display the maker record or a list of matching
records.
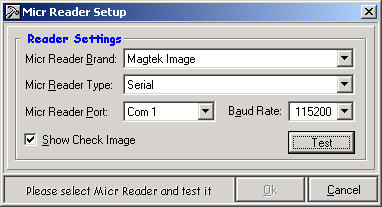
Micr Reader
Brand: The MICR reader manufacturer/model driver name.
Micr Reader
Type: The type of port used to connect the MICR reader.
Micr Reader
Port: The specific computer port used to connect the MICR reader.
Baud Rate:
The transmission speed used by the MICR reader.
Show Check
Image: Displays the check image after it is scanned.
Receipt Setup
A printer can be setup to print the transaction
information after it is completed.

Printer:
Select the printer to be used to print receipts from the list of available
printers.
Header/Footer:
Information that will print at the top (header) or bottom (footer) of each
receipt.
Cutter is
Active: When checked, indicates there is an automatic cutter that will
slice the end of the receipt.
Print second copy:
When checked, a second receipt will print automatically.
Signature Capture Setup
SigCard can acquire customer signatures from either
the Signature Pad or the Scanner.
System Settings
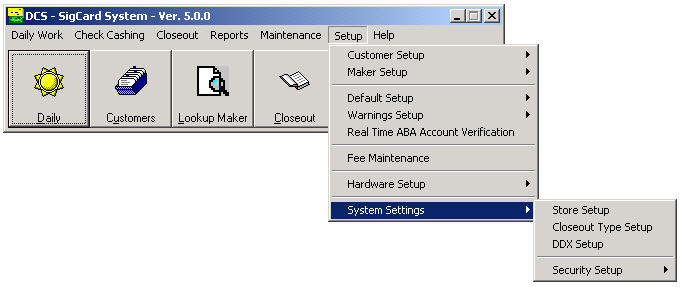
Store Setup
Store Setup is designed to give you options that can
be tailored to fit your own check cashing needs. Start by assigning a Store Name and Store
Number to the system.
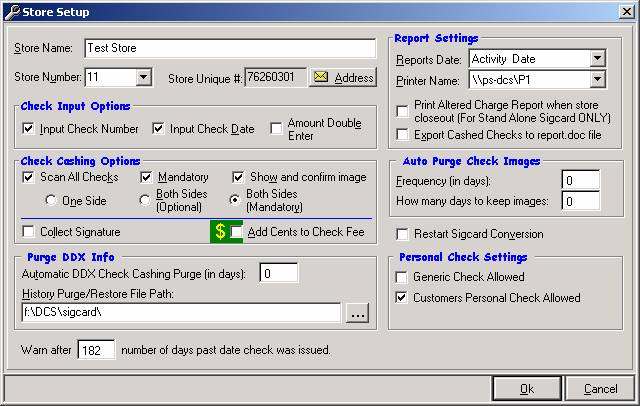
Store
Name: This is the name of the store/currency exchange. User defined.
Store
Number: The number of the store/currency exchange. User defined.
Store
Unique Number: This value is determined by the DCS database. It can not be
altered from SigCard.
Report
Settings: Select whether the
Activity date, Session start date, or Session end date will be used on all
reports.
Printer Name:
Select the printer that will be used to print documents from SigCard.
Check Input
Options
Input Check
Number: When checked, the teller will be required to enter the check number
of the check to be cashed.
Input Check
Date: When checked, the teller will be required to enter the date the check
was issued.
Amount Double
Enter: When checked, the teller will be required to enter the check amount
as a double entry.
Check Cashing
Options
Scan All
Checks: When checked, all other check cashing options are enabled and can
be selected as needed. If no selection is made for one side or both sides
(optional or mandatory), then Both Sides (Mandatory) will be selected
automatically.
Mandatory:
When checked, the user will be required to scan a check before completing the
check cashing transaction.
Show and
confirm image: When checked, after the check is scanned the image will be
displayed and the user will confirm the image.
One Side:
When a check is scanned, only one side of the check could be scanned.
Both Sides
(Optional): When a check is scanned, both sides of the check could be
scanned.
Both Sides
(Mandatory): When a check is scanned, both sides of the check must be
scanned.
Collect
Signature: Used with Signature Pad. When checked and a Signature Pad is
installed, after a check to be cashed is scanned, the customer is required to
sign the Signature Pad and the electronic signature is saved with the check
image.
Add Cents to
Check Fee: Some stores have requested a special type of fee for check
cashing. The fee is first calculated according to a certain percentage or
following other formulas as it was previously. Then when the payout is
calculated, the cents part is added to the fee so that a round dollar amount is
handed to the customer.
Personal Check
Settings
Generic Check
Allowed: When checked, the Daily Work menu will include Cash Generic
Personal Check.
Customers
Personal Check Allowed: When checked, the Daily Work menu will include Cash
Customer’s Personal Check.
Print Altered
Charge Report when store closeout (For Stand Alone SigCard ONLY): When checked,
if any check cashing transactions were completed with a fee alteration, then
the Altered Charge Report will be printed when the store is closed out.
Purge DDX Info
Automatic DDX
Check Cashing Purge (in days): The number of days for automatic check
cashing purge.
History
Purge/Restore File Path: The full pathname for the file where the
purge/restore file will be saved.
Auto Purge
Check Images
Frequency (in
days): This value is how often SigCard will look for check images to be
purged. This field works with the field “How many days to keep images”. When
SigCard looks for images to be purged it will use the value in the second field
to determine which check images to archive.
How many days
to keep images: This field is used
with the field “Frequency (in days), to determine which check images should be
purged. When SigCard looks for images to be archived it will compare the value
in this field to the date of the transaction (when the check was cashed). Any
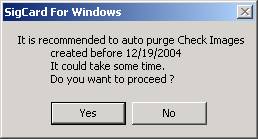
check images that are within the date range will be archived. This message will display prior to the purge.
The images will be stored in the file path defined in “History Purge/Restore
File Path” field, as \CHECK_IMAGES\yyyymmdd.zip (the file name represents the
archive date).
Closeout Type Setup
Closeout Type Setup lets you choose the
options you prefer for closeout.

Closeout Type: Select either Store Closeout or
Teller Closeout. The selected value will affect the items on the Closeout menu.
Run Deposit Tape: When checked, at the beginning of any
closeout, the teller will be requested to enter each check amount that was
cashed during the session. The total will be verified by SigCard and a deposit
slip with fees collected will be provided.
Print Closeout Report: When
checked, a report will be printed automatically after the closeout is
completed.
DDX Setup
The DDX Server is the digital backend communication
server for the database information, allowing information to be accessed freely
and efficiently, with the proper access privileges. DDX is used with multiple
stores running SigCard and/or main/back office environments that want to share
customer and/or maker information.
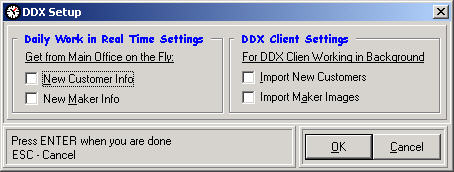
New Customer Info: When
checked, whenever a new customer is entered SigCard will automatically check
the Main Store/Back Office to see if the customer exists. If the customer does
not exist a new customer record will be created. This message will display.
New Maker Info: When checked, whenever a new maker
is entered SigCard will automatically check the Main Store/Back Office to see
if the maker exists. If the maker does not exist a new maker record will be
created.
Import New Customers: When
checked, new customer records will be imported from the Main Store/Back Office
to the remote stores. This is done in background and at timed intervals.
Import Maker Images: When
checked, new maker records will be imported from the Main Store/Back Office to
the remote stores. This is done in background and at timed intervals
digiCHECK.net Setup
In Sigcard version 5.4.1.53 and later, a new
service is fully integrated called digiCHECK.net. For information on available features or on how
to set this up, click the following link.
http://www.dcsorg.com/whats_new/5.4.1.51%20changes.htm#_1.)_digiCHECK.net_is_now_integrated
Security Setup
These options are unavailable to tellers.
Password
Setup
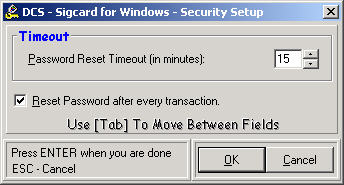
Password Reset
Timeout (in minutes): After the specified number of minutes of inactivity
the teller will be required to enter their password to gain access to the
system again.
Reset Password
after every transaction: When checked, the teller(s) would be required to
enter their password after each transaction. This is beneficial if multiple
tellers are using the same computer terminal, it assures that the transactions
will be associated with the proper teller.
User
Setup
The ‘User Maintenance’ screen is used to setup
individual user or teller logins. From
this screen you are able to assign users a login name, password, access rights,
and check cashing limits.
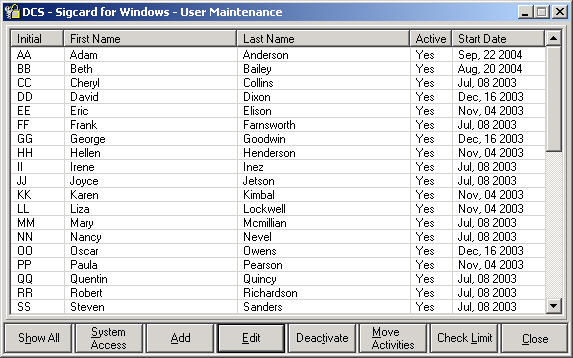
Show All. Display all user logins including all logins that have been
deactivated.
System Access. Set user access levels with ‘99’ being the lowest level of
security with the most access rights and ‘1’ being the highest level of
security with the least access rights.
Add. Setup a new user login and password.
Edit. Edit/modify a user login.
Deactivate. Remove an active user login so that the user may no longer
access SigCard.
Move Activities. Transfer all system activity from the selected user to
another user in the system.
Check Limit. Impose a single check cashing amount limit on a teller.
Close. Exit current ‘User Maintenance’ screen.
Module Setup
This option is not yet available.
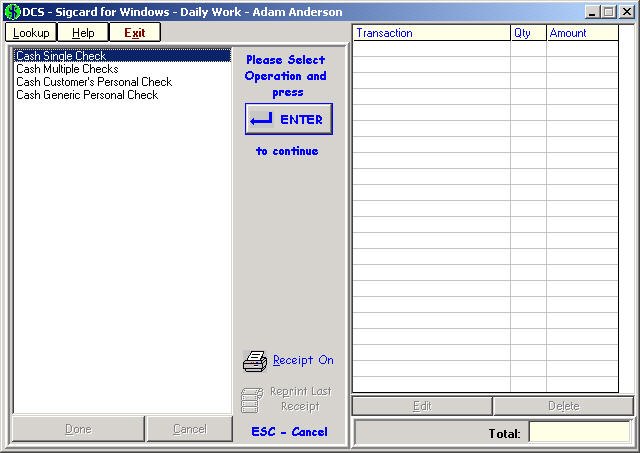
Daily Work
– Main Menu
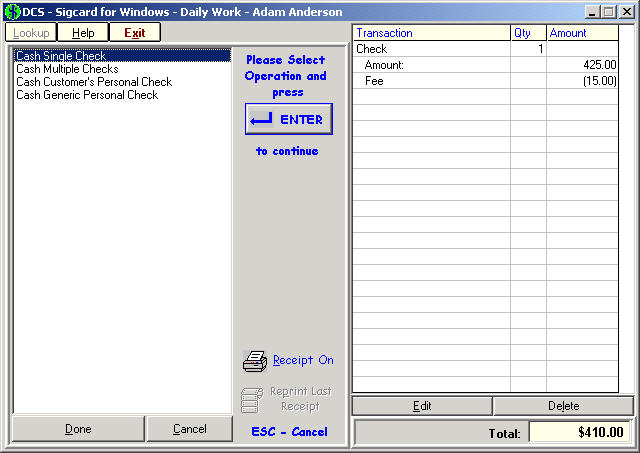
Main SigCard check cashing
screen. All check cashing can be done
through this screen or through the customer’s record. The left side of the menu allows you to Cash
Single Check, Cash Multiple Checks, or Cash Personal Check. By selecting ‘Lookup’, you are able to search
for and view a particular Maker. The
middle portion gives you the option to print a receipt for each transaction or
to reprint a receipt for the previous transaction. The right side of the menu shows a
transaction breakdown with the transaction type, quantity, amount, associated
fee(s), and the total for all transactions during the current session.
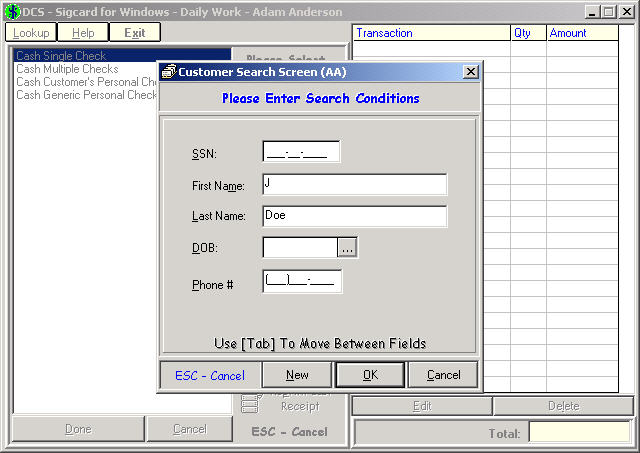
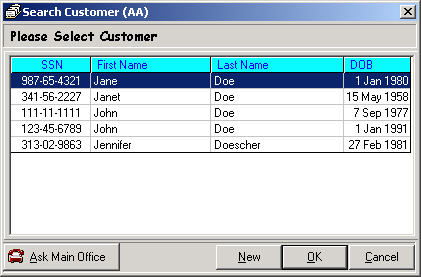
Customer Search
Screen
Whenever a check cashing
transaction is selected, the Customer Search Screen will be displayed. Enter a
portion of the customer information to perform the search and select the
customer record. Refer to the ‘Customer
Menu’ for a detailed explanation on how to enter search criteria.
If multiple matches are found, a list of the matching records will be
displayed.
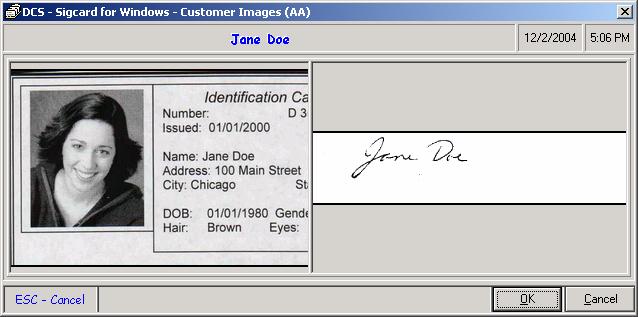
Customer Images
SigCard can scan customer
identification cards (driver license, state ID, student ID) and store the image
with the customer information. If any images are available, when the customer
is found in the database, they will be displayed. This could include; a digital
image of the customer taken with a digital camera, any customer IDs, and/or an
electronic signature. Any, warnings associated with this customer will also be
displayed. Once the warnings have been read, press the key that is displayed in
the scrolling text at the bottom to continue.
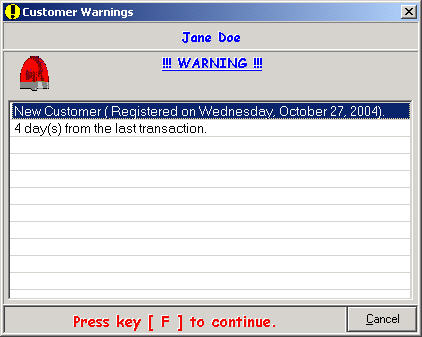
Customer Warnings
SigCard has several optional
warnings that can be activated. Customer warnings are based on the number of
days that have passed since a specific event has occurred. There are warnings
for new customer and last transaction events. If a customer meets the
timeframe, a warning message will be displayed prior to the customer
information screen. Once the warnings have been read, press the key that is
displayed in the scrolling text at the bottom to continue.
Customer Warnings
may appear prior to the Customer Information Screen.
To continue,
press the key for the letter that appears in red.
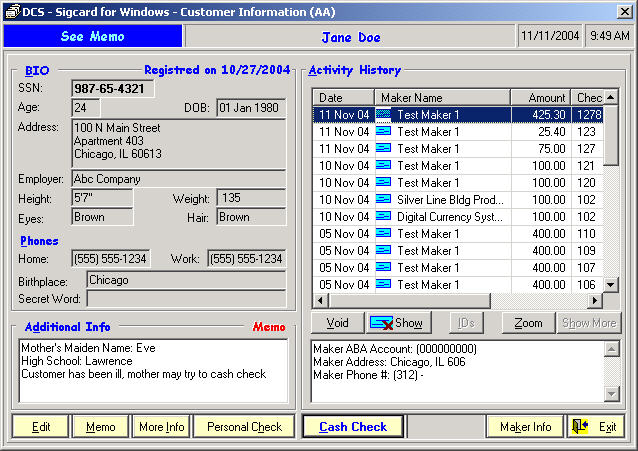
Customer
Information Screen
The Customer Information
Screen is displayed after a completed Customer Search has matched to an existing
customer record. This screen is used to enter a new customer, update an
existing customer and to process a check cashing transaction.
Whenever you choose a Cash
Checking transaction from the Daily Work menu or click on the Customer toolbar
icon; the Customer Information screen is displayed. This is where you will scan
an image of the check and record the check information.
Note: Refer to ‘Customer
Menu’ for detailed explanation on all screen functions.
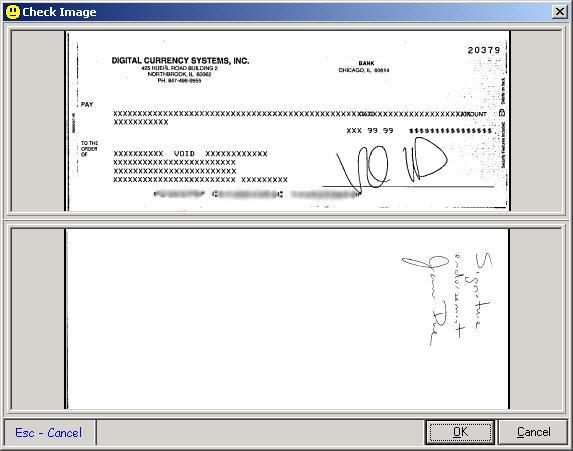
Check Image
From the Customer
Information screen, a check image can be acquired by scanning the check through
the MICR reader.
1) Slide the check through the MICR reader
with the front of the check facing the machine.
2) Look at the image, to verify that it
scanned properly.
3) If
you are satisfied with the image, scan
the back of the check if required.
4) Click OK
Warnings may occur to inform you of recent activities
related to the maker or the specific check.
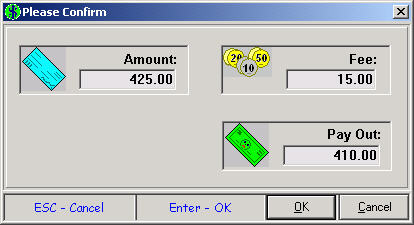
Cash Check
Once the check has been
scanned, the ‘Check Cashing’ screen displays the Maker check image and Maker
information, the customer signature (if one is on file), Bank information, and
check description.
Once these are reviewed, the
check amount, the associated check fee, check number, and check date must be
entered. The default maker fee will be used but can be overridden by selecting
‘Fee Tables’ and choosing a different fee to cash the check.
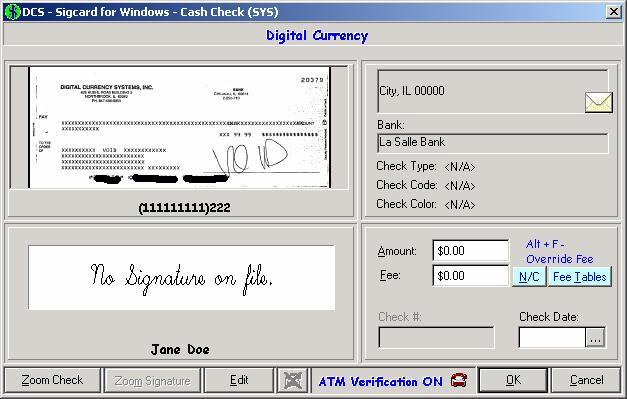
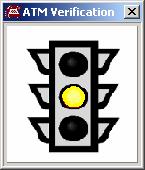
ATM Verification
ATM Verification is turned on or
off based on settings in Real Time
Maker Account Verification.
For the check in this example, verification is turned on.

When verification
is turned off, click on the red phone to override system settings.
Once the check
amount and date have been entered, the maker account is verified with ACH
Direct.

The image above is
displayed while your computer connects to the ATM network.
Green Light
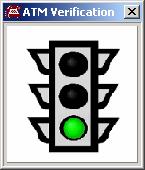
Several responses are possible
based on current data for this maker.
The green light indicates:
1) The
account is open and valid
2) The
account is not overdrawn (positive funds)
3) The
check being verified has not been reported as stopped
4) Funds
verification ONLY IF such verification is available for the account. At the time of this writing, most accounts
can NOT have funds of a certain amount verified. If you are interested in this information,
then you should insure the “Alert
if Funds were not verified” checkbox is CHECKED.
Yellow Light
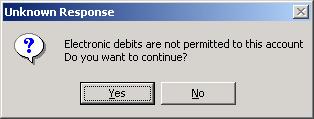
A yellow light means ‘proceed with
caution.’ An additional message box explains why
this maker received the cautionary response.
As an example, the above would indicate that the account is good, but
electronic debits are not allowed. This
could be quite normal, as is the case for many company payroll accounts. This would probably be considered negative
information with respect to personal checks.
Another common reason for a
yellow light is ‘no useful information is available.’ This would indicate that no information at
all was found for the account.
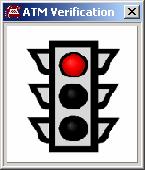
Red Light
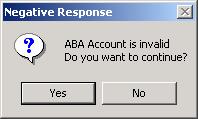
Similar to the yellow, a red light
is accompanied by a message box explaining why this maker got the negative
response. In the example above, the ABA
Account number is invalid. Other red
light examples are insufficient funds, stopped checks, and closed accounts.
Cashing a check
that receives a red light is usually not recommended.
A word on Check
Verification:
Although
we at DCS feel this is a useful tool, it should be considered exactly that: a
tool. A green light does not mean that
the check should be cashed- it simply means that the check passed criteria
which are stated above. Conversely, a
red light does not always mean that a check should not be cashed. The system verifies checks against actual
accounts at banks which are participating members. Should a bank not participate, the system
attempts to verify the check utilizing a nationwide negative-check
database. Negative databases provide
information which is not always accurate and not always applicable.
At
the time of this writing, participation by Banks runs as high as 80% in Western
States, and around 35% in Mid-Western States as an example. The check verification information is
provided by a third party processor with whom you need an agreement.
DCS does not guarantee the accuracy of check verification information,
nor does DCS assume any responsibility or liability for it's use.
Manager Approval
Based on certain criteria,
such as amount or type of check, it may be necessary for a manager to approve
the check before it can be cashed. There
are two new features available (in version 5.4.1.53 and later) that enforce a
teller check limit and make it possible for off-site managers to approve checks.
The following link contains
information on setting up a check limit and how this is enforced using a
supervisor’s passcode.
http://www.dcsorg.com/whats_new/5.4.1.51%20changes.htm#_5.)_Enforcing_a_teller_check_cashin
Additionally, it is now
possible for off-site managers to view the check before approving it. This is done through a digiCHECK.net
service. For more information, click the
following link.
http://www.dcsorg.com/whats_new/5.4.1.51%20changes.htm#_2.)_Check_Approval_through_digiCHEC
Transaction List
Once the check has been
entered into the system, a transaction breakdown is shown on the Daily Work
screen. Other transactions can be entered, or if the customer has completed all
transactions, select ‘Done’.
The transaction
is complete.
The Daily Work
screen is displayed and ready for the next customer.
Customer information makes it easy to identify your
customers and track their check cashing history. Each customer’s file can
include name and address information as well as information for identifying the
customer. Identification information includes; a photo, signature,
identification card images, and contact notes. There is also a history of all
check cashing transactions which can include an image of the check that was
cashed.
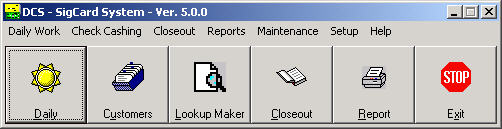
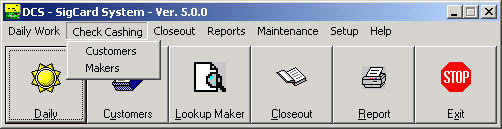
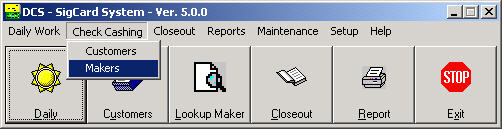
To access customer information, add a new customer,
cash a check, or to perform any other customer function, click on the Customer
icon or choose 'Customers' from the
Check Cashing menu.
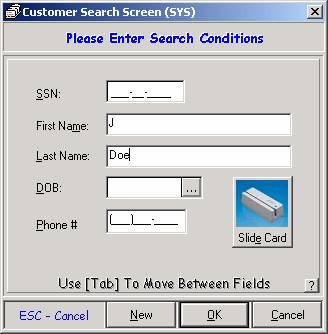
Customer Search
The Customer Search screen is used to find an existing
customer or add a new customer. You should always search for the customer first
before adding them as a new customer. There are various ways to perform a
customer search. SigCard allows you to
look up a customer by name, social security number, birth date, and/or phone
number. Below is an explanation of search conditions.
SSN. Enter a portion of the customer’s social
security number or the entire customer’s social security number to retrieve a
list of customer’s with that number.
Name. Enter a portion of the customer’s name or the
customer’s full name. You may get undesirable results if you enter the
customer’s name and the name you enter differs from the way it is spelled in
the system. For example, if you search
for “Jane Doe”, but the customer information is “Jayne Doe”, you will not get a
correct match. To avoid this, expand the search by entering ‘J’ as the first
name and ‘Doe’ as the last name. A few more search results will be found, but
you will be able to select ‘Jayne Doe’ from the results screen.
DOB. Enter the customer’s date of birth to
retrieve a list of customer’s with that birth date.
Phone. Enter a portion of or the entire
customer’s phone number to retrieve a list of customer’s with that phone.
Generally, the lesser amount of characters or fields
that are entered, the larger the search results or the more customers
retrieved. The more characters or fields
entered, the narrower the search results or the fewer customers retrieved. In
most cases, enter the information that you have on the customer and perform the
search. If undesirable search results
are retrieved, then perform a broader search on the customer by removing a
field or some characters from the search criteria that was entered. A combination of fields or just a single
field may be used to perform a customer search.
You may want to use last name and date of birth (DOB) to perform the
search or you may just want to search on Social Security Number (SSN). SigCard is flexible and allows you to perform
a search with any available information you have on a customer.
Slide Card. Anywhere you see the blue Slide Card button, the customer
information can be retrieved by sliding a Credit Card or Drivers License (in
states with magnetic stripe). The information stored on a Drivers License
varies depending on what State you are in.
Customer Search Results
The customer search results will list multiple
matching customer records that were found using the search criteria that was
entered on the ‘Customer Search Screen’. From this screen you are able to add a
new customer or view an existing customer’s record.
Add New Customer
To add a new customer,
choose 'New' from either the customer search screen or the customer search
results screen. Following is a list of the data fields in the customer record
that you will be asked to fill in.
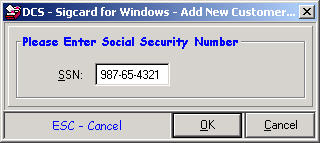
SSN The social security
number is a unique number assigned to an individual. You will be asked to
confirm this number to insure accuracy. SigCard will not allow you to continue
until both entries match. Social security numbers are supposed to be
unique, but there are some situations where the customer may not have a social
security number, or the number is used to represent a specific group of
individuals. For these situations, SigCard allows the use of a social security
number to be shared by those individuals.
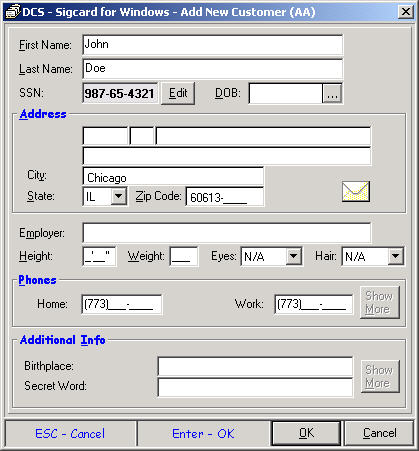
Name. The first and last name of the customer.
Birth Date. The birth date of the customer in the format
MM/DD/YYYY.
Address. The street address, direction, and street name for a
customer. Note that 2 space areas separate this field into 3 smaller fields.
The address 1211 E. 19th Street would actually be entered as 1211 (Street
Address), E (Direction), and 19th Street (Street Name).
City. The city the customer
resides in.
State. The state the
customer resides in.
Zip Code. The customer zip code, which can accept an optional 4-digit extension.
Employer. The customer's employer name.
Height. The height of the customer, in the format 6'01".
Weight. The weight of the customer.
Eyes. The eye color of the customer.
Hair. The hair color of the customer.
Phone. The area code and phone number of the customer.
Additional Info. Enter the information associated with these user
defined fields.
Reverse
Telephone/SSN Lookup
It is now possible to verify
customer information once the phone number and/or social security number has
been entered. This is possible due to an
integration of Sigcard with digiCHECK.net.
For more information on how this works, click the following link.
http://www.dcsorg.com/whats_new/5.4.1.51%20changes.htm#_3.)_Lookup_customer_through%20reverse
Duplicate
Social Security Numbers
A unique social security
number is issued to each individual. However, there are situations where the
use of a generic social security number is required. When a new social security
number is entered, SigCard, checks to see if that number is already assigned to
another customer in your system. If an
existing record matches or there are multiple matches, the list of matches will
be displayed. You can choose to Add Anyway and continue entering the new
customer with the existing SSN.

Customer
Information
The customer information
screen is used to enter a new customer, update an existing customer and to
process a check cashing transaction. There is additional customer information
that can be customized for your store such as mother’s maiden name, birthplace
or other information that will identify the customer. A flag can be set for the
customer with a do not cash restriction, or details about the customer that
will help you serve them better. If the customer is blind or deaf, you may want
to have a memo in the record.
The left side of the screen
is the customer demographics portion of the record. The right side of the screen is the history
portion of the customer record. The functions are slightly different for each
side.
Customer Record
The left side of the screen
contains all of the basic customer information: name, address, physical
description, etc. If a flag has been set, it will display in the upper left
hand corner of the screen. Flags can be informational only (blind, deaf), a
reference to the memo section or a do not cash restriction
Menu Options
The menu options, ‘Edit’,
‘Memo’, and ‘More Info’, are explained below:

Edit Allows you to modify
the customer information fields.
Memo Opens the memo text box
where you can enter comments about the customer.
The
recommended format for entering comments:
Date: MM/DD/YY
Initials: Teller
initials
Description
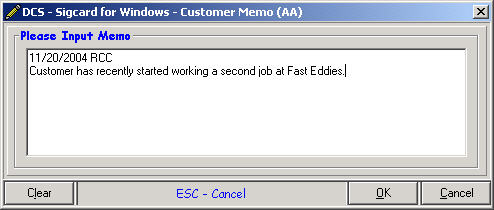
To remove an individual
memo, select the memo text with the mouse, press the delete key, and select
‘OK’. To clear the entire memo screen, select ‘Clear’ and then select ‘OK’.
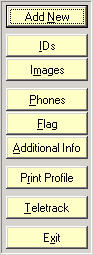
More Info A pop up menu
appears with these items.
Add new. Allows you to add a new customer
record to the database,
IDs Allows you to enter or view customer
identification types and images.
Images Allows you to scan or view customer
photo, signature and/or check
Phones Allows you to enter or view up to four phone
numbers
Flag Allows you to set an informational, memo or do not cash
flag
Additional
Information Allows you to enter
custom information
Print Profile Prints a profile of the customer record
Teletrack
Related to PayDay Loans. Provides a history of Teletrack information.
Exit Closes the pop up menu.
|
|
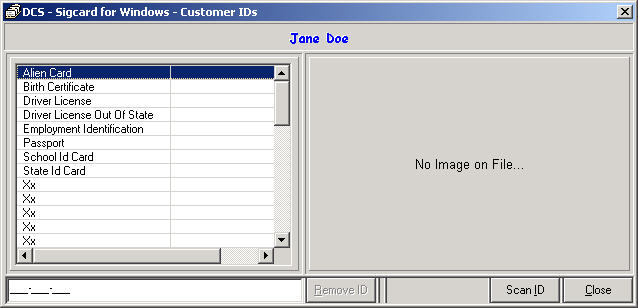
Customer IDs
Customer identification
types are user defined and there is no limit to the number of types you can define.
There is a 30 character identification value field that can be formatted to the
specific ID type. As an example, a driver’s license begins with an alphabetical
letter, so the format could be A123-456-789. Each customer can have as many ID
types associate with it as necessary. You can also scan the ID to have an image
stored with the customer information.
Images
You can take an image of the customer with the camera,
capture the customer signature with the signature pad, and/or scan the customer
signature using a scanner.
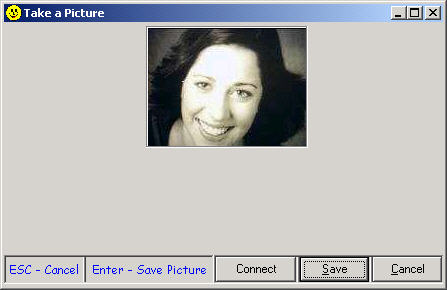
Take Picture
Align the customer with the camera and select ‘Take
Picture’.
Once you are satisfied with the image, select ‘Save’
and then ‘OK’.
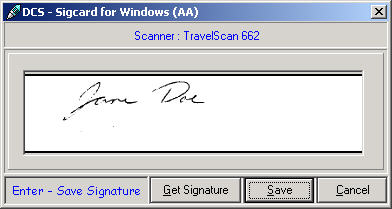
Get Signature
You can scan the customer signature card, or if you
have a signature pad you can capture the signature from the pad. When you are
satisfied with the signature scan, select ‘Save’ and then ‘OK’. If you are not satisfied, adjust the image
and select ‘Get Signature’ again until you get a good signature scan.
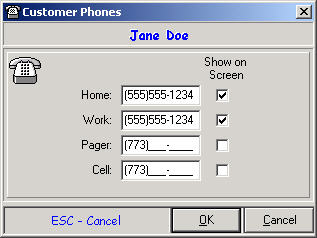
Phones
Up to four phone numbers can be entered for each
customer. Two of the numbers can be displayed on the customer information
screen.
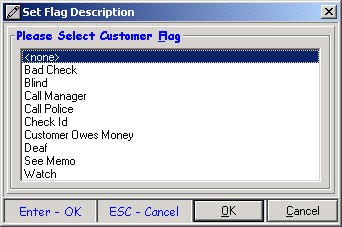
Set Flag Description
Customer flags are used for information, reference to
a memo, or to restrict the customer from cashing a check. Many flags can be
defined. Only one can be assigned to a customer at a time. If a flag is
selected that has Bad Check in it’s definition, the Cash Check button will not
enable and you will not be able to complete the check cashing transaction.
To flag a customer’s record, select the flag you wish
to use and then select ‘OK’. The flag
will appear in the upper left corner. If
there is to be no flag or to clear a flag, select ‘<none>’.
Customer Additional
Information
Additional customer information can be customized for
your store. There are unlimited custom fields that can be added. The
information will appear on the customer information screen in the Additional
Info section. This information can be used for security reasons or to verify
information.

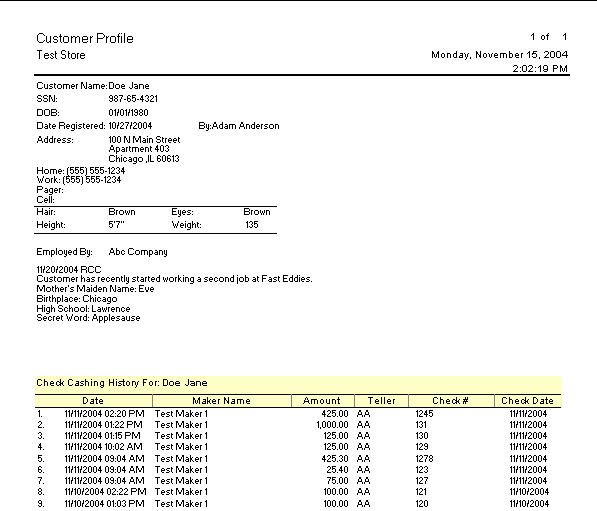
Print Profile
The customer profile includes the name and address of
the customer, as well as other information. The profile can be previewed on the
screen, or printed to the report printer.
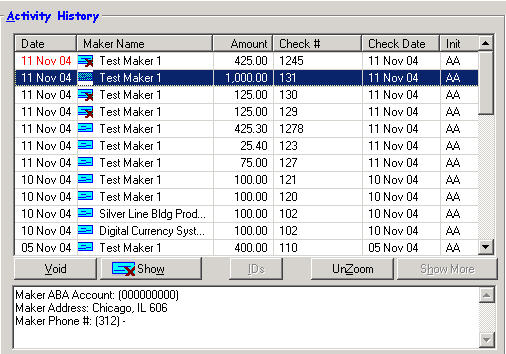
Check
Cashing Activity History
The customer's check cashing
history is displayed in the upper right hand section of the Customer
Information screen. All check cashing transactions are listed, eleven are
visible at a time, starting with the most recent activity. Use the scroll bar
to view older transactions. For each check
cashing transaction SigCard displays the date of the transaction, the maker,
the check amount, and the initials of the teller who recorded the transaction.
In addition, if the check number and/or the check date was entered, this
information will also be displayed. You can void a check transaction from the
list by selecting ‘Void’. If the check was voided, the date of the transaction
will appear in red. A transaction can only be voided on the same day it was
presented to be cashed. If the check was scanned, the Maker Name will include a
blue icon and the image(s) can be displayed by selecting ‘Show”.
digiCHECK.net
- Check Image Archive Service
digiCHECK.net is now
integrated with Sigcard and offers a variety of services. The Check Image Archive Service stores all
check images on the digiCHECK.net web server. The user can then access a customer’s check
history from other locations. For more
information, click the link below.
http://www.dcsorg.com/whats_new/5.4.1.51%20changes.htm#_4.)_Lookup_and_view_check_through_d
Maker
Information
Below the Activity History
is a section that includes information about the specific check maker for the
selected transaction.
Options
Void/Unvoid. Allows
you to void or unvoid a check in history. This can only be done before a
closeout has been completed that would include the specific transaction. The
transaction date will appear in red for a check that was voided.
Show. If the check
and/or signature were scanned into the system when it was cashed, a blue check
image will appear next to the maker name in the check history. By selecting ‘Show’, you are able to display
and print the check and/or signature image.
IDs. Allows you to
view all IDs that have been scanned into the system for the customer.
Zoom/Unzoom. Allows
for full viewing of the entire activity history screen.
Cash Check. This
option allows you to cash the customer’s check.
See the ‘Daily Work’ ‘Customer Info’
screen section for a detailed explanation on the check cashing
procedure.
Show More. Future
enhancement - not yet available.
Maker Info. This
option will display the ‘Maker Information’ screen for the selected check.
Refer to the section on Makers for more information.
Exit. Close and exit
the ‘Customer Information’ screen.
A maker is the actual bank and account where the check
was issued. The maker file is as important as the customer file. Several
customers may have checks issued against the same maker, as an example, a
payroll account. Verification of maker information is important. DCS offers an
ATM Verification option, which may or may not be at your store. Once you verify
a maker, the information should be stored or updated in the maker file. You
will be able to track makers that have a history of bad or bogus checks and
make sure you do not cash checks for a bad risk in the future. To access a
maker file, select 'Makers' from the SigCard Main menu, or choose Lookup Maker.
Maker Search
A maker record is accessed using the ‘Maker Search
Screen’. Enter a portion of the maker information to perform the search and
select the maker record from the results. If you are using a MICR-reader, you
can look up the maker by scanning the check through the reader.
ABA Account
Enter a portion of or the entire ABA number to retrieve a list of makers with
that ABA. You can also scan a check through the MICR-reader and the ABA number
will be read into this field.
Company Name
Enter a portion of or the entire company name.
First Name
Used to look up Personal Check accounts. Enter a portion of or the entire first
name.
Last Name
Used to look up Personal Check accounts. Enter a portion of or the entire last
name.
Note When entering search criteria, the more information
or fields entered, the more concise the search results. The less information or
fields entered, the broader or more general the search results. Partial entries or a combination of partial
field entries may be used, or complete entries or fields may be used to perform
the search depending on how broad or narrow you would like the search results.
Search Maker
The following screen displays the maker search results
that were found using the search criteria that was entered on the prior ‘Maker
Search Screen’. From this screen you are
able to add a new maker or view an existing maker’s record. To view an existing
Maker, select the maker from the list and press Enter.

Add New Maker
To add a new maker, choose
'New' from the maker search screen. Following
is a list of the data fields in the maker record that you will be asked to fill
in.
ABA/Checking Account Number. The combination of the bank's ABA
number and the maker's checking account number creates a unique number for each
maker, with some occasional exceptions (see Duplicate ABA numbers, below).
Because of the importance of this number in identifying the correct maker,
SigCard forces you to enter it twice for verification, just like the customer's
social security number. You can only continue adding the rest of the maker
information if you key in the number correctly both times. If you are using a
MICR-reader, scan the check when asked to input the number. Use of an
electronic reader will eliminate human error.
Company Name. Enter the company name, exactly as
it appears on the check.
Contact Name. A contact name
for the above company.
Phone. The area code and
phone number of the company.
Fax. The area code and phone
number of the fax at the company.
Address. The address field
actually consists of 3 smaller fields: Address, Direction and Street Name. For
a company residing at 1200 W. MAIN, the address would be
1200, the direction would be W. and the street name would be MAIN.
2nd Address. An additional address
line is supplied, for a Suite No., Office No., etc.
City. The city the company
resides in.
State. The state the company
resides in.
Zip Code. The company zip
code, which can accept an optional 4-digit extension.
Fee Table. The fee schedule
associated with all transactions for the maker.
Bank Info.
Bank Name. The name of the bank issuing the check for
the company.
Address. The address of the bank issuing the check for
the company.
Check Description. A
physical description of all checks associated with the maker.
Duplicate
ABA Numbers
An ABA number uniquely
identifies a maker. A government agency will often use the same ABA number for
multiple service accounts. The United States Treasury uses the Federal Reserve
Bank with the ABA number of 00000518. Another bank may provide payroll service
to their clients. You can have a situation where there will be several
different companies all registered with the same ABA number, since the maker is
really the bank and not the company! SigCard provides you with an easy way to
distinguish whether or not this is the case; you can use the 'ABA Only' field
to identify the company check as a "payroll service" check versus a
normal payroll check. This option is used
when the bank is initially setup in the system through the maintenance menu.
Maker
Information
The ‘Maker Information’
screen has many functions. This screen
can be used to edit a maker’s record, view the maker’s check cashing history, maintain
maker check images, impose check cashing limits, and various other maker
functions.
Maker Details
The left side of the screen displays all of the basic
information about the maker; name, address, ABA/Checking Account number, and
general bank information established when setting up this maker.
History
The right portion of the 'window' displays the most
current checks cashed for this maker. To view more transactions, use the scroll
bar to move up or down.
Menu Options
Edit Allows you to edit basic information about
the maker.
Memo Just as you can record a memo or a note on a
customer record, you can also record a memo on a maker’s record. The same
format applies:
Date: MM/DD/YY
Memo: Free form description
Initials: Teller
initials
To remove an individual memo, select the memo text
with the mouse, press the delete key, and select ‘OK’. To clear the entire memo screen, select
‘Clear’ and then select ‘OK’.
Once you have entered the memo, the word ‘Memo’ will
show up in red to indicate that there is a memo for this maker.
More Info The 'More' option allows you to add a new
maker; edit the existing maker; scan the maker's signature; set a flag for the
maker; or print the maker's history.
Add New Allows you to
add new makers. Refer to the ‘Add New
Maker’ section.
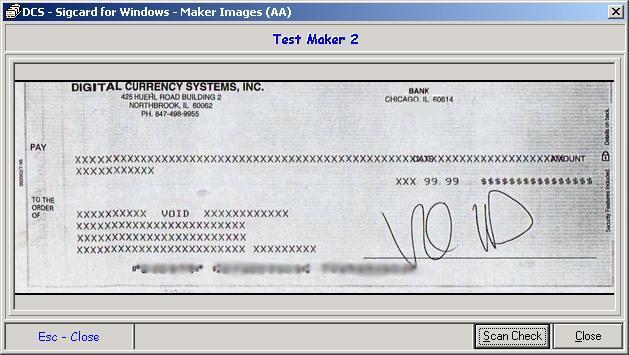
Images Allows you to
scan and store a reference color image of the check for the maker. This is useful when you are cashing the
customer’s check, you are able to view an image of a check from their
maker. Scanning a check is very similar
to scanning customer IDs. Select ‘Scan
Check’ twice and then select ‘Save’ to save the check image for the maker.
Bogus Checks Allows
you to scan and store an image of a bogus check that was attempted to be cashed
for the maker. Once ‘Add’ or ‘Edit’ is
selected, refer to the image scanning above for an explanation on the scanning
procedure to save a check image.
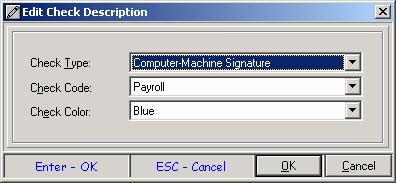
Check Description
Allows you to provide a physical description of all checks cashed for
the maker. Use the drop down boxes to
choose descriptions from the lists provided.
Link To Customer
Allows you to link a specific customer to the maker.
Flag Allows you to
flag a maker’s record using one of the pre-defined flags.
Set Flag Description
Maker flags are used for information,
reference to a memo, or to restrict the customer from cashing a check for a
specific maker. Many flags can be defined. Only one can be assigned to a maker
at a time. If a flag is selected that has Bad Check in it’s definition, the
Cash Check button will not enable and you will not be able to complete the
check cashing transaction.
To flag a maker’s record,
select the flag you wish to use and then select ‘OK’. The flag will appear in the upper left
corner. If there is to be no flag or to
clear a flag, select ‘<none>’.
Warnings Will display
any warnings that are in place for the maker.
Such as the maker being flagged, an extended length of time from the
last transaction, etc.
Bad Checks Allows you
to flag the maker record if a bad check is on file. If this option is checked, the words ‘Bad
Check’ will appear in the upper right corner in red.
Show Statistics.
Provides a breakdown of check amounts cashed for the maker. Breakdown will show stats such as smallest,
largest, or average check amount, weekly number of checks, weekly dollar
amount, and check cashing frequency by day.
Print Profile. Allows
you to print maker information in full detail and will show general maker
information to check images and the maker check cashing history.
Bank Maintenance.
Refer to ‘Bank Maintenance’ under the ‘Maintenance’ menu for a detailed
explanation on this option.
Exit. Leave the ‘More
Info’ menu and return to the main ‘Maker Info’ screen.
Check Limit Check cashing limits can be imposed on total
amounts for a single check, daily check amounts, and weekly check amounts for
any given maker. The defaults that were
initially setup will appear but can be changed.
Show If the check and/or signature were scanned
into the system when it was cashed, a blue check image will appear next to the
maker name in the check history. By
selecting ‘Show’, you are able to display and print the check and/or signature
image.
Customer
Info Allows you to view general
customer details about the check cashed and the customer’s address. Optionally, you are able to access the entire
customer record to view customer details or view the customer’s check cashing
history.
Exit Leave ‘Maker Information’ screen.
SigCard has two types of Closeout methods: Teller Closeouts and Store Closeouts. Teller closeouts allow each individual teller
to closeout their own drawer totals separately.
Store closeouts will closeout the totals for all teller drawers at one
time. The Closeout type that your system
is using was determined during the initial SigCard setup.
Teller Closeout
There are two types of teller closeouts: Total Check Closeout and Deposit Tape
Closeout. The total check closeout is a
one time total check amount entry that will closeout the teller’s drawer. The deposit tape closeout is a check by check
amount entry that will closeout the teller’s drawer after each individual check
amount has been entered.
Total Check Closeout
Enter the total amount of all checks cashed. If the your total does not match the total
the system calculated, you will get a warning message showing the system total
and the difference between them. After
the correct total has been entered, select ‘Finish’. A “Closeout Successful” message will appear
and the teller will be closed out.
Deposit Tape Closeout
Enter the amount of each check cashed one by one
pressing the enter key after each check.
When complete, a total dollar amount as well as a total check count will
appear at the bottom of the screen.
Select ‘OK’ to continue.
A totals summary screen will appear and you are
required to select a destination for the deposit tape to print to. Select ‘Finish’ to complete the closeout and
print the deposit tape.
Store Closeout (Teller)
If teller closeouts are being done, a store closeout
must be completed after all teller closeouts have been done. Simply select ‘Store Closeout’ from the
closeout menu. Select ‘Start’ and wait
for the “Store successfully closed” message to appear. Select ‘Close’ after the store has been
closed out.
Store Closeout (Only)
There are also the same two types of store closeouts
as there are teller closeouts: Total
check closeout and Deposit tape closeout.
The store closeouts work in the same manner as the teller
closeouts. The total check closeout is a
one time total check amount entry that will closeout the teller’s drawer. The deposit tape closeout is a check by check
amount entry that will closeout the teller’s drawer after each individual check
amount has been entered.
Total Check Closeout
Enter the total amount of all checks cashed. If the your total does not match the total
the system calculated, you will get a warning message showing the system total
and the difference between them. After
the correct total has been entered, select ‘Finish’. A “Closeout Successful” message will appear
and the teller will be closed out.
Deposit Tape Closeout
Enter the amount of each check cashed one by one
pressing the enter key after each check.
When complete, a total dollar amount as well as a total check count will
appear at the bottom of the screen.
Select ‘OK’ to continue.
A totals summary screen will appear and you are
required to select a destination for the deposit tape to print to. Select ‘Finish’ to complete the closeout and
print the deposit tape.
SigCard has the capability of generating various
customer and maker reports.
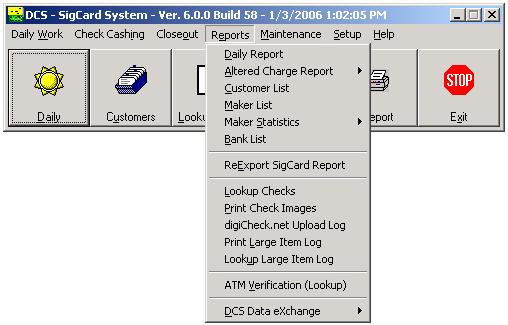
Daily Report
The Daily Report is a list of the all checks cashed for each maker on the
current day/session. The report can be for specific teller(s) or inclusive of
all tellers.
Altered Charge
Report This report can be printed for the current day/session or for past
dates. The report will list any check cashing transaction where the service fee
was altered.
Customer List
This report can be printed for customers with specific flags, or no flag, that
have had activity within a specified date range.
Maker List
This report can be printed for makers with specific flags, or no flag, that
have had activity within a specified date range.
Maker
Statistics These reports can be printed for makers by specific information.
Specific Date. You can
generate a report of checks cashed on a specific date.
Specific Date of
Week. This report will print all
checks cashed on a specific day of the week within the range of dates you
specified. For example, you can choose to print a report of all checks cashed
on Friday between 06/01/2003 and 09/30/2003.
Date/Range Summary. This option allows you to print a report of
all checks cashed between two date ranges.
Hourly Break Down. This
report will print all check cashing activity for a specific hour within a
selected date range.
Specific Maker. This
report is for a specific maker by activity date range. The report can be in
detail or in summary format.
Bank List This report generates a list of all banks with general
information from the bank record. The list can be sorted alphabetically or by
ABA.
ReExport SigCard Report This report will export check
cashing transaction information into a file named “Report01.doc” and store it
in the same directory where SigCard is run. There is a setup in Setup/System
Settings//Store Setup for this report to run. The checkbox for “Export
Cashed Checks to report.doc file” must be checked, if it is not checked, the
menu item for this report will be disabled (grayed). Note the checkbox option
may only be visible by System Administrator.
Lookup Checks This report can be generated by date(s) of store closeout. The report
will list any check that was cashed within the timeframe of the closeout. You
can select specific checks from the list and view more details and/or the
scanned check image. There is an Advanced Search that will use the store
closeout timeframe, and will search by Maker, Customer and/or Check
Information.
Print Check’s Images. This report will print images of all
checks scanned into the system for a particular day/session.
Lookup Large Item.
View a report of checks that exceed a specified limit. For more information, follow this link: http://www.dcsorg.com/whats_new/5.4.1.51%20changes.htm#_8.)_Large_item_report.
ATM Verification (Lookup) This
report will display a list of account verification requests and the response.
This report is related to Setup/Real Time ABA Account Verification.
The Maintenance Menu contains options that allow for
bank maintenance, customer/maker file maintenance and other data maintenance.

Bank Maintenance
This option allows you to look up, edit, add, and
delete Banks in SigCard.
Bank Search Screen
The bank search screen search criteria can be entered
in the same way the customer or maker search criteria is entered. In addition, an existing bank can be looked
up simply by scanning a check with that bank’s ABA through the MICR-reader.
Search Bank
The search results from an ABA of ‘00’ and a bank name
of ‘tes’. From this window you can choose Delete, New or OK. If you choose OK
the bank information will display and you can edit the record.
Edit Bank
Bank maintenance screen. This is the record found as a result of the
search criteria entered above. All
fields in the bank record can be maintained from this screen.
Delete Bank
You cannot delete a bank record if it has a
relationship with one or more makers. To delete a bank, simply select ‘Delete’
and confirm the bank deletion.
Add
To add a new bank, choose 'New' from the bank search
screen. Because of the importance of the
ABA number in identifying each bank, you will be asked to key in the ABA twice
to prevent errors in entry. To be more
accurate and efficient, simply scan a check from the new bank through the
MICR-reader. It will automatically populate the ABA number.
ABA number This number is
filled in from the entry on the previous screen.
Verify ABA
Only. This option refers to what the
MICR reader will associate with the maker for the ABA/Account number. US
Treasury checks, as well as many state and local government checks, use a
numbering sequence that is different than other makers. The ABA number on these
'special' checks is also the checking account number. The number that would
normally be MICR encoded as the checking account number is, in fact, the check
number. Therefore, when scanning these checks, SigCard can ignore the numbers
that would be associated with a checking account and instead, popup a list of
'special' makers that are listed by ABA only numbers.
Bank name. The name of the bank.
Contact name. A contact name at the bank.
Phone. The area code and phone number of the
bank.
Fax. The area code and phone number of the fax at
the bank.
Address. The street address of the bank.
City. The city the bank resides in.
State. The state the bank resides in.
Zip Code. The bank zip code, which can include an
optional 4-digit extension.
Reset Password
When multiple tellers are using the same computer
and/or when a teller leaves the computer to do other work, this will keep the
SigCard application running, but require the next transaction to be preceded
with a password to access the application. There is a set up option that is
often used when multiple tellers are using the same computer. It is in
Setup/System Settings/Security Setup/Password Setup. The checkbox for “Reset
Password after every transaction” when checked will require a password before
the next transaction can be entered.
Sax Comm/Ocx Switch
This menu option should only be visible to System
Administrator. It is used for internal testing only.
Export to Main Office
This option will create an XML file of the information
stored in the database. This file can then be imported (see Import to Main
Office) into the Main Office. There are three types of records including images
that can be exported.
Banks
Customers
Makers
Import from Main Office
This option will create database records from an XML
file (see Export to Main Office) of information from the Main Office to be
stored in an alternate database. There are three types of records including
images that can be imported.
Banks
Customers
Makers
Export to Another Store
This option will create an XML file of the information
stored in the database at one store, then, imported (see Import to Another
Store) into another store. There are three types of records including images
that can be exported.
Banks
Customers
Makers
Import from Another Store
This option will create database records from an XML
file (see Export from Another Store) of information from an alternate database.
There are three types of records including images that can be imported.
Banks
Customers
Makers
Import Data From DOS
For DCS use only, options include:
All Info (with or without
images)
Only images
Purge History
SigCard allows you to purge database records. These
records will be deleted and archived. They can be retrieved and restored to the
database. The archived file(s) will be stored in the directory designated in
Setup/System Settings/Store Setup “History Purge/Restore File Path”. During the
purge process several files will be created in this directory, the final file
will be stored as a zip file and any related archive files will be deleted.
There is also a SigCardPurge.log file created in this directory.
There are three
types of records including images that can be purged.
Customer
Maker
Transaction
For Customer and Maker records, you can purge a single
record, merge two records into one, or you can purge multiple records based on
last transaction date.
Purge Customer / Maker Records
The customer/maker purge menu offers three options.
Single
Customer/Maker This option allows
you to select and purge a single customer/maker record. After selecting the customer/maker, you will
be asked to confirm the deletion.
Duplicate
Customer/Maker This option allows
you to merge the information for two identical customers/makers. Select customer/maker you want to delete (all
information and transactions will be moved into the second customer/maker).
Next, select the customer/maker you want to move the transaction information
into, adding the information to the existing record. Select ‘Delete’ and confirm the
deletion. The information and
transactions will now be contained in the second record. If any images,
signatures and/or ID’s were in the source file, but not in the target file,
those images will be merged into the target file. Employer and physical descriptions
(height, hair, etc) will not be merged. If the source file has a flag and the
target does not, the flag will not be merged into the target.

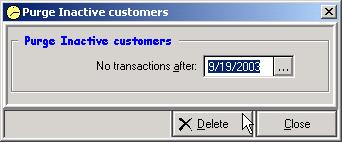
Inactive
Customer/Maker. After using SigCard
for a considerable time period, you will probably want to purge inactive
customers/makers. The system allows you to delete customers/makers and/or their
transaction records if no activity is found subsequent to the date you are
asked to input. For example, if you
input ‘01/01/2000’ and the current date is ‘08/08/2003’, the system will delete
all customers/makers who have not had any activity since ‘01/01/2000’.
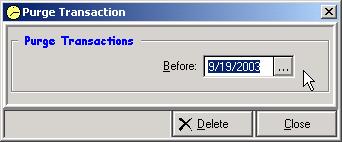
Purge Transactions
Select a date to delete all SigCard transactions prior
to date selected.
The SigCard
‘Help Menu’ allows you to access general software information, detailed
version/connectivity/user information, and the SigCard help documentation.
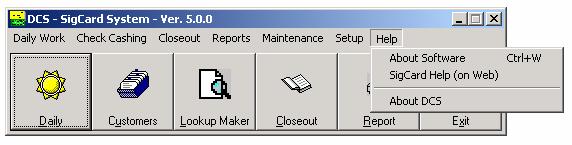
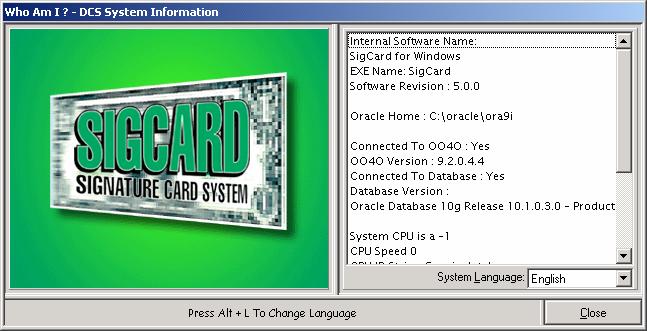
About
Software
Provides
SigCard version, Database connectivity,
CPU, and current user session information.
SigCard
Help (on the Web)
Provides access to the most
current SigCard documentation via the ‘Help Menu’.
About
DCS
Provides
basic SigCard copyright information.